No Churn Strawberry Ice Cream
Growing up in Florida means I learned early that turning on the oven in July feels like a personal attack, and that is a lesson that has never left me.
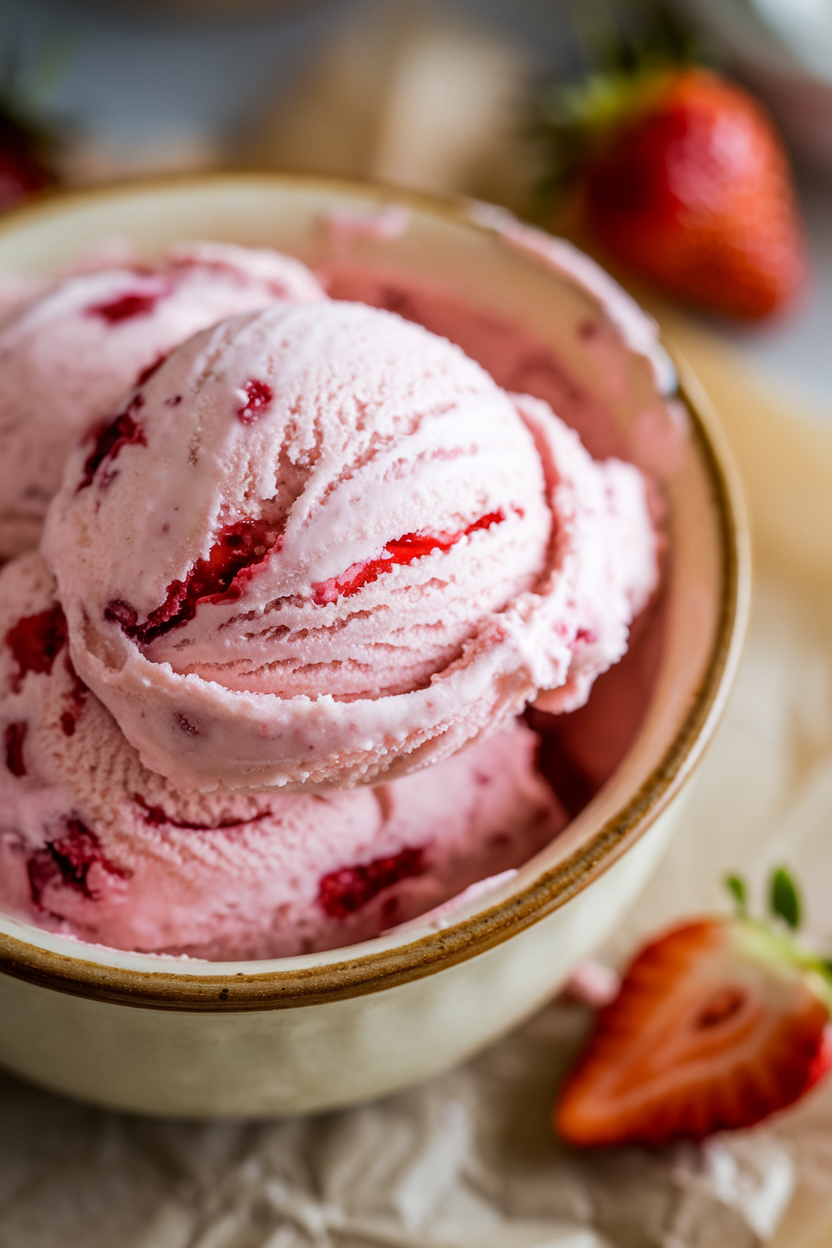
No Churn Strawberry Ice Cream became my summer salvation — all the satisfaction of making something from scratch without adding a single degree of heat to an already sweltering kitchen.
My daughter requests this every time we pick up strawberries at the farmer’s market, and honestly, I never need much convincing. It comes together with just a few real ingredients and no special equipment, which means you can have homemade ice cream in your freezer by tonight.
Once you see how easy this is, store-bought starts to feel a little unnecessary.
How to Make No Churn Strawberry Ice Cream at Home
Why You’ll Love This Recipe
- Comes together in just 10 minutes with no ice cream maker required
- Perfect for using up those perfectly ripe strawberries before they go bad
- The texture is impossibly creamy and scoops beautifully straight from the freezer
💚 If you love no churn frozen treats, you’ll also love this Frozen Mango Coconut Popsicles recipe.
What You’ll Need
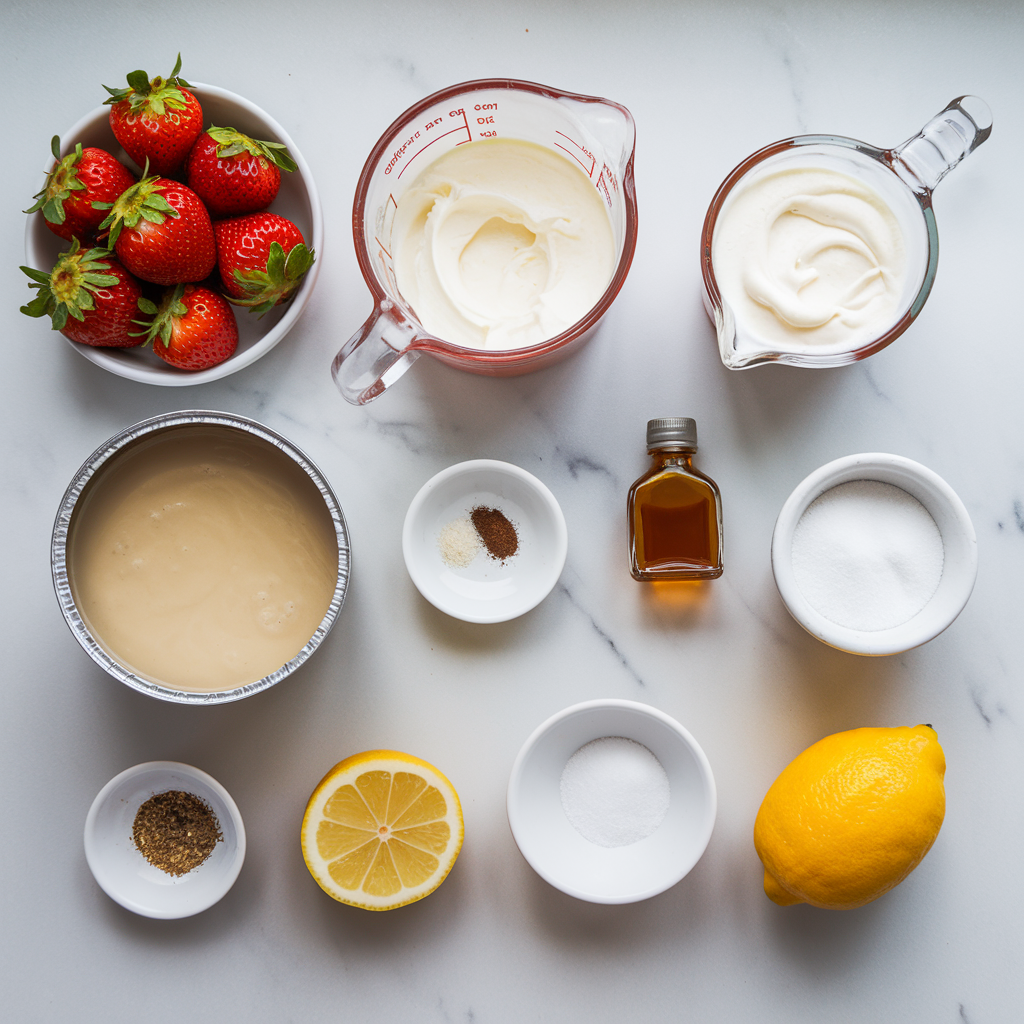
- heavy whipping cream — cold
- sweetened condensed milk — 14 oz
- fresh strawberries — hulled and chopped
Before You Start Cooking
A few things that make this recipe work:
- ► Use strawberries that are very ripe for the best flavor — they should smell sweet and give slightly when pressed
- ► Don’t skip mashing some of the berries — the juice they release prevents ice crystals from forming
- ► Press plastic wrap directly onto the ice cream surface before the lid to prevent freezer burn
Easy Ingredient Swaps
| Instead of | Try This | When To Swap |
|---|---|---|
| fresh strawberries | frozen strawberries, thawed and drained | Great when fresh berries aren’t in season. |
| granulated sugar | honey or maple syrup | Add natural sweetness with more complex flavor. |
| vanilla extract | strawberry extract | Intensifies the berry flavor even more. |
| lemon juice | lime juice | Adds a slightly different citrus brightness. |
| sweetened condensed milk | coconut cream + powdered sugar | Makes it dairy-free for those who need it. |
| heavy cream | coconut cream, chilled | Another dairy-free option that whips beautifully. |
How To Make No Churn Strawberry Ice Cream
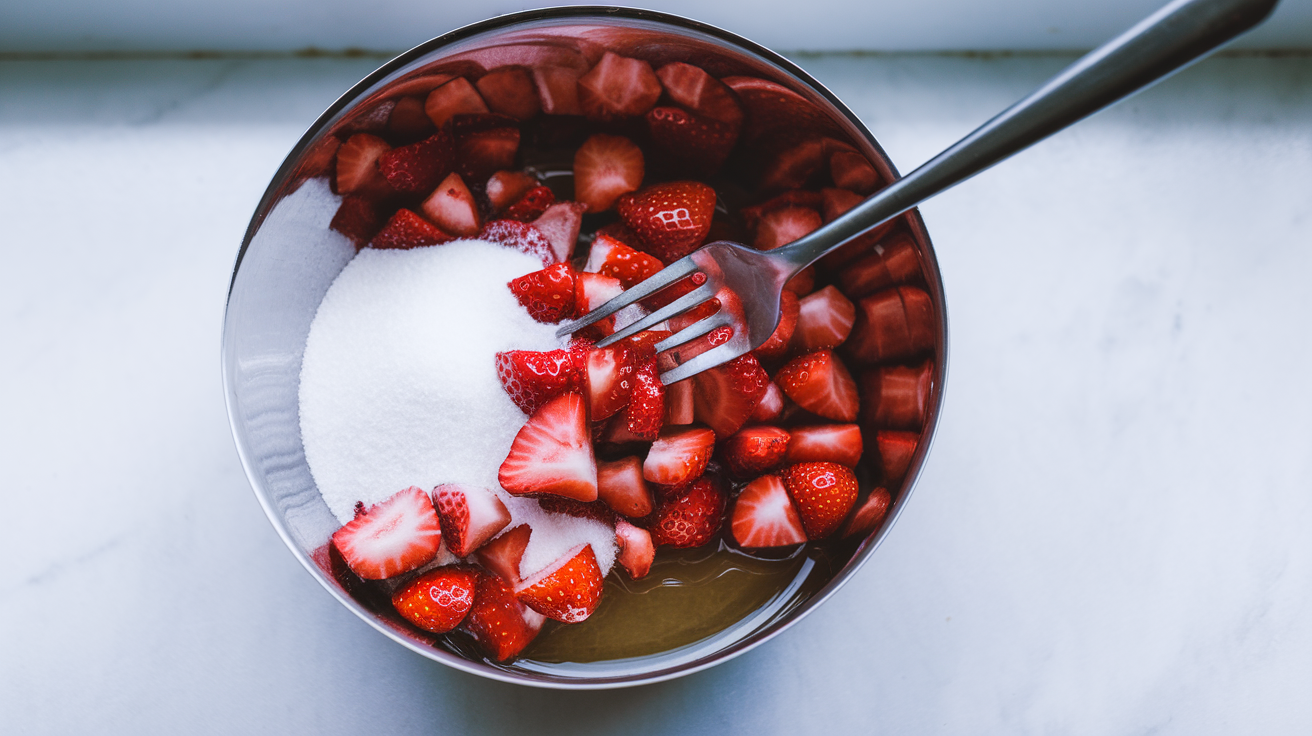
Prepare the strawberries
In a medium bowl, combine chopped strawberries, sugar, and lemon juice. Mash about half the strawberries with a fork, leaving some chunks for texture. Let sit for 10 minutes to release juices.
Whip the cream
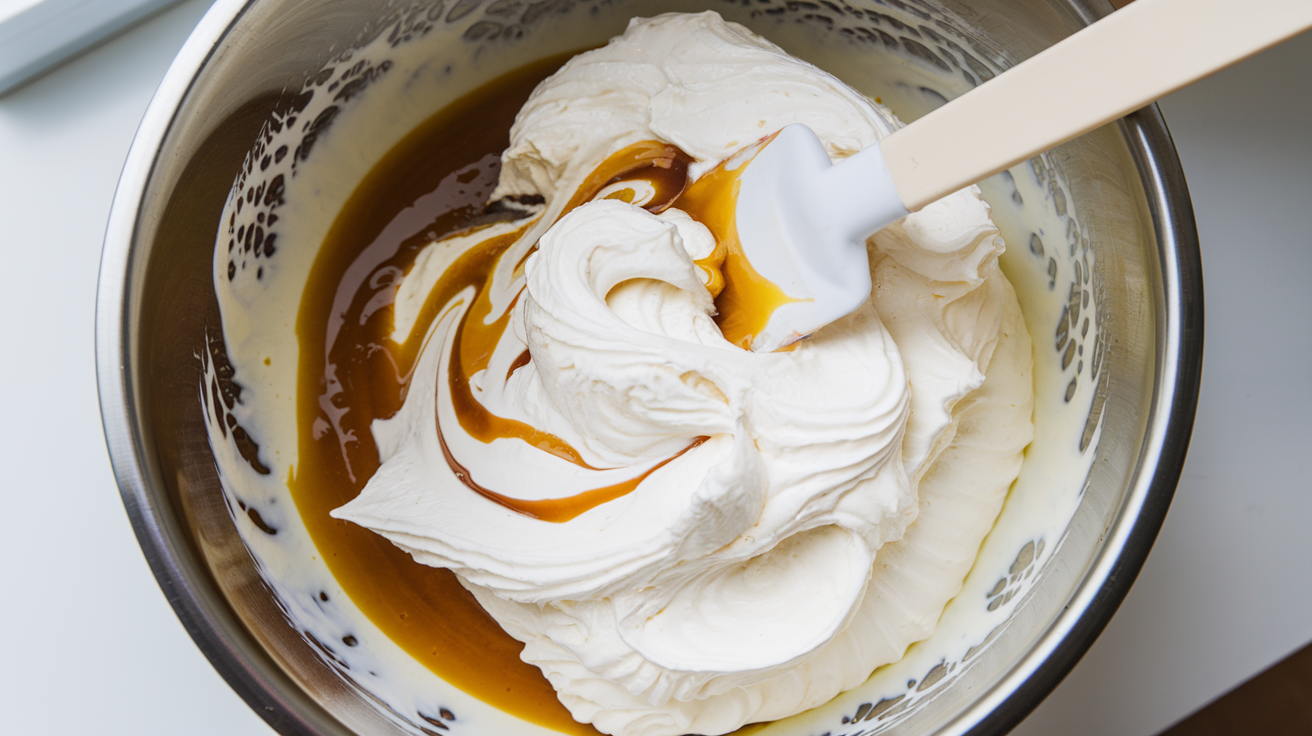
In a large bowl, whip heavy cream with an electric mixer until stiff peaks form, about 3-4 minutes. Be careful not to overwhip.
Fold in condensed milk
Gently fold the sweetened condensed milk and vanilla into the whipped cream using a rubber spatula. Fold just until combined — don’t overmix.
Add strawberries
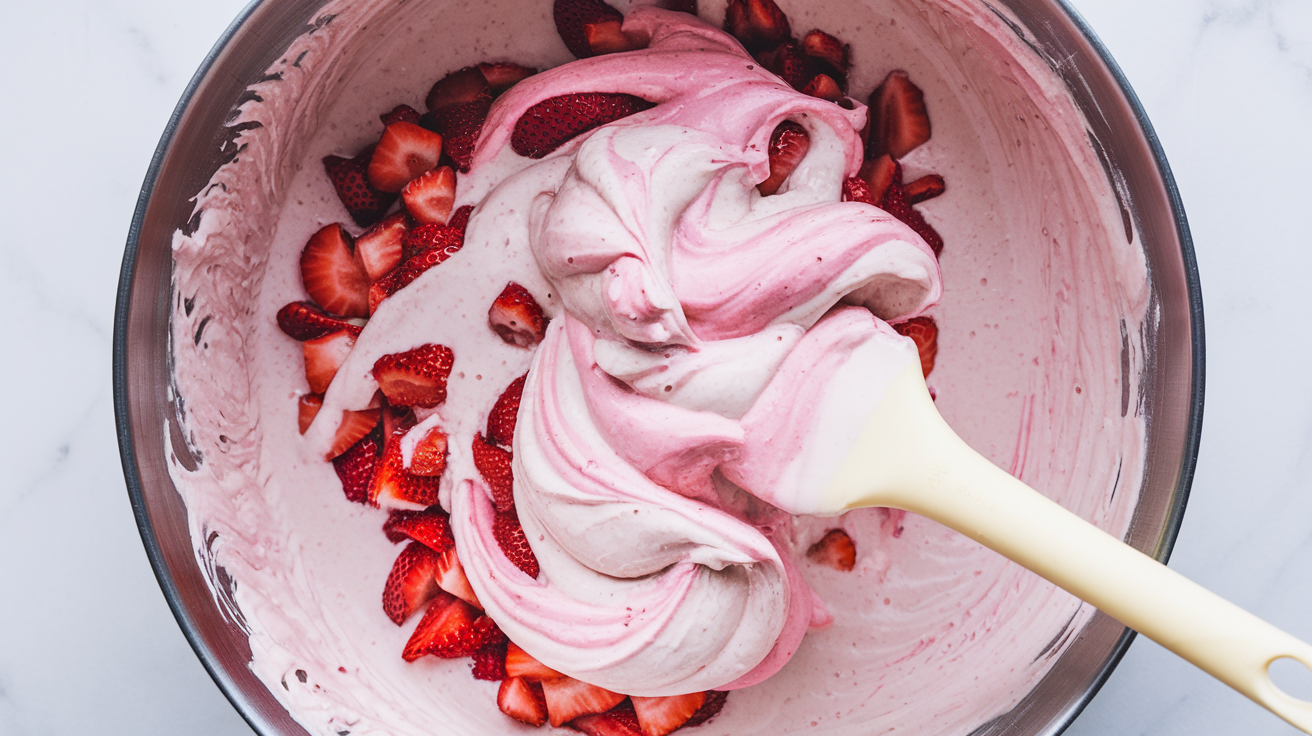
Fold in the strawberry mixture, including all the accumulated juices. Swirl gently to create ribbons of strawberry throughout the cream.
Freeze
Transfer to a freezer-safe container and cover with plastic wrap pressed directly onto the surface. Freeze for at least 4 hours or overnight until firm.
Pro Tips For The Best Results
- Keep the cream very cold before whipping — Cold cream whips faster and holds its volume longer once folded.
- Fold the strawberries in gently — Overmixing deflates the cream and ruins the scoopable texture.
- Include all the strawberry juices — Those accumulated juices add flavor and help prevent icy crystals.
Have a tip that works for you? Drop it in the comments below — we’d love to hear it! 👇
Common Mistakes To Avoid
- Overwhipping the cream until it breaks — Stop as soon as stiff peaks form — the cream should hold its shape but still be smooth
- Using strawberries that aren’t ripe enough — Choose berries that smell sweet and give slightly when pressed — underripe berries make bland ice cream
- Skipping the mashing step — Mash at least half the berries to release their juices, which prevents ice crystals
- Not covering properly before freezing — Press plastic wrap directly onto the surface, then add the lid to prevent freezer burn
Make Ahead and Storage Tips
This ice cream keeps beautifully in the freezer for up to 6 weeks — press plastic wrap directly onto the surface before adding the lid to prevent freezer burn and icy patches on top.
Macerate the strawberries up to 24 hours ahead and store them covered in the refrigerator — the extra time actually deepens the flavor and produces even more juice.
Freeze the finished ice cream in a shallow loaf pan rather than a deep container so it firms up more evenly and scoops cleanly without needing to sit out first.
Pull the container out of the freezer and let it sit at room temperature for 5 minutes before scooping — no churn ice cream firms up harder than store-bought and this small step makes all the difference.
What To Serve With No Churn Strawberry Ice Cream
- Serve in waffle cones with a drizzle of chocolate sauce for a classic ice cream parlor experience
- Layer between shortbread cookies for an easy ice cream sandwich (try these Soft Lemon Sugar Cookies for a citrusy twist) that feels fancy
- Top with fresh berries and a sprig of mint for an elegant summer dessert
- Pair with warm brownies or pound cake for the perfect contrast of temperatures
Delicious Variations To Try
- Strawberry Lemon Curd Swirl — Drop 3 tablespoons of store-bought lemon curd over the top of the ice cream base before freezing and swirl gently with a knife — the tartness cuts through the sweetness beautifully.
- Strawberry Shortcake Crunch — Fold in 1/2 cup crushed golden Oreos or shortbread cookies in the final step for a strawberry shortcake-inspired crunch in every scoop.
- Roasted Strawberry — Roast the strawberries at 400°F for 20 minutes before mashing — it concentrates the flavor and gives the finished ice cream a deeper, jammy sweetness that fresh berries alone can’t match.
More Berry Recipes
Love this recipe? Here are a few more of my favorites you will want to try:
No Bake Mini Strawberry Cheesecakes | Mini strawberry cheesecakes are the cutest summer treats with fresh strawberry flavor! Individual portions make them perfect for parties!
Berry Swirl No Bake Icebox Cake | Layers of berries and cream create the most beautiful swirled dessert! No baking required and feeds a crowd beautifully!
Can you make ice cream without an ice cream maker? +
Absolutely! This no-churn method uses whipped cream and sweetened condensed milk to create the same creamy texture as churned ice cream without any special equipment.
How long does homemade strawberry ice cream last? +
Properly stored in the freezer with plastic wrap pressed to the surface, this ice cream stays fresh for up to 2 months, though it tastes best within the first month.
Why is my no-churn ice cream too hard to scoop? +
Let the ice cream sit at room temperature for 5-10 minutes before scooping, or run your scoop under warm water between servings to make it easier.
Can I use frozen strawberries instead of fresh? +
Yes, just thaw them completely and drain excess liquid first. Frozen berries often release more juice, which actually helps prevent ice crystals.
What makes no-churn ice cream creamy without churning? +
The combination of whipped cream (which adds air) and sweetened condensed milk (which prevents large ice crystals) creates a naturally creamy texture without churning.
Can I reduce the sugar in this recipe? +
The sugar helps with texture and prevents the ice cream from freezing too hard, so reducing it significantly may affect the final result. Try using very ripe berries to reduce added sugar naturally.
Why do you mash some of the strawberries? +
Mashing releases the berry juices, which distribute throughout the ice cream and help prevent large ice crystals from forming during freezing.
Can this recipe be made dairy-free? +
Yes, substitute the heavy cream with chilled coconut cream and replace sweetened condensed milk with a dairy-free version or make your own with coconut cream and powdered sugar.
Ready To Make No Churn Strawberry Ice Cream?
The best part about this ice cream is how it captures the essence of summer in every spoonful — sweet, creamy, and bursting with real strawberry flavor. It reminds me why homemade treats are always worth the small effort, especially when that effort takes less than 15 minutes and delivers something this satisfying. Make a batch this weekend and watch it disappear faster than you thought possible.
No Churn Strawberry Ice Cream
By At The Sunday Table
Growing up in Florida means I learned early that turning on the oven in July feels like a personal attack, but that never stopped my craving for homemade desserts. No churn strawberry ice cream became my summer salvation — all the satisfaction of making something from scratch without adding any heat to an already sweltering kitchen. My daughter requests this every time we pick up strawberries at the farmer’s market, and honestly, I never need much convincing.
Ingredients
Instructions
-
1Prepare the strawberries
In a medium bowl, combine chopped strawberries, sugar, and lemon juice. Mash about half the strawberries with a fork, leaving some chunks for texture. Let sit for 10 minutes to release juices.
-
2Whip the cream
In a large bowl, whip heavy cream with an electric mixer until stiff peaks form, about 3-4 minutes. Be careful not to overwhip.
-
3Fold in condensed milk
Gently fold the sweetened condensed milk and vanilla into the whipped cream using a rubber spatula. Fold just until combined — don’t overmix.
-
4Add strawberries
Fold in the strawberry mixture, including all the accumulated juices. Swirl gently to create ribbons of strawberry throughout the cream.
-
5Freeze
Transfer to a freezer-safe container and cover with plastic wrap pressed directly onto the surface. Freeze for at least 4 hours or overnight until firm.
Notes
- ► Use strawberries that are very ripe for the best flavor — they should smell sweet and give slightly when pressed
- ► Don’t skip mashing some of the berries — the juice they release prevents ice crystals from forming
- ► Press plastic wrap directly onto the ice cream surface before the lid to prevent freezer burn
- ► Let the ice cream sit at room temperature for 5 minutes before scooping for easier serving
Nutrition Per Serving

Hey, I’m Rachel — Orlando mom, home cook, and believer that the best meals are simple, nourishing, and made with love. At The Sunday Table is my little corner of the internet where comfort food meets real life.